iMac G4
15”
History
[specific to 15” model]
Introduced: January 7, 2002
Discontinued: July 1, 2004
Original Retail Price: $1,799 [800 MHz model]
Model #: M6498
Tech Specs
Display: 15” TFT LCD
Processor: 800 MHz PowerPC G4
RAM: 512 MB
Hard Drive: 128 GB SSD (upgraded)
Optical Drive: SuperDrive (DVD-R / CD-RW)
OS: 9.2.2 / 10.1.4
Condition & Notes
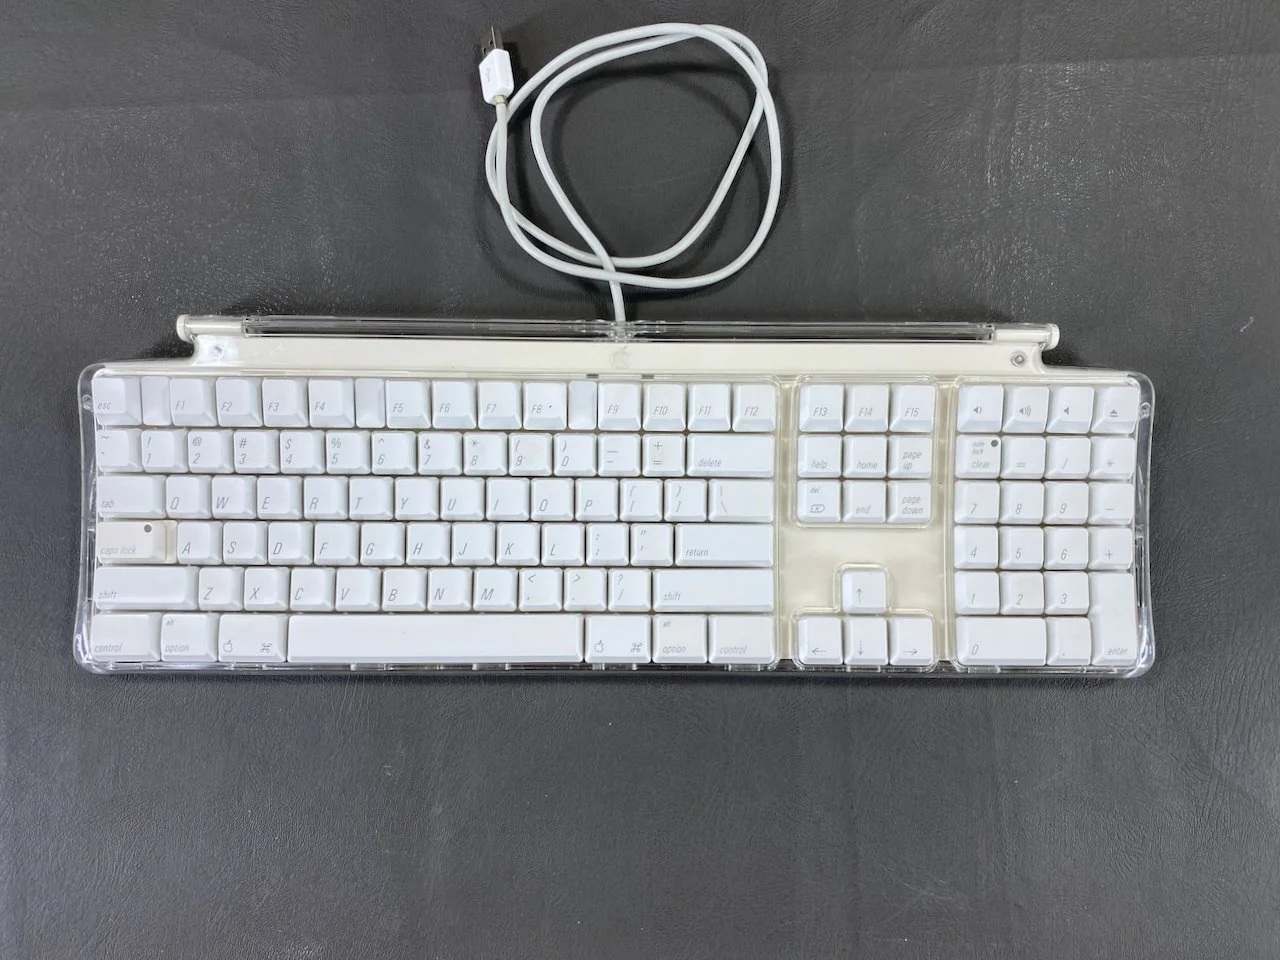
This unit is in mint condition, and is complete with all the original packaging, keyboard, mouse, power cable, modem cable, software CDs, documentation, and Apple Pro Speakers.
It was purchased from the original owner, whose son used it for schoolwork, gaming, and listening to iTunes. The original ship date listed on the box is 05/07/2002.
Since acquiring the machine I have applied new thermal paste to the heatsink, replaced the main fan, cleaned out the dust from inside the machine, and performed a “retrobrite” treatment on the keyboard to restore its original white color. In 2025 I also replaced the original 60 GB hard drive with a 128 GB SSD. HDD to SSD conversion is a common technique used in vintage computer preservation, as the original hard drives are prone to failure due to age. This upgrade also makes the computer quieter, faster, and more reliable. Scroll to the bottom of the page for more on these upgrades.
It is in fully working order and currently has both Mac OS 9.2.2 and OS X 10.1.4 installed in a dual-boot configuration.
Model Identifier

This particular machine is the higher-end of the two original models of iMac G4, featuring an 800 MHz processor and a SuperDrive.
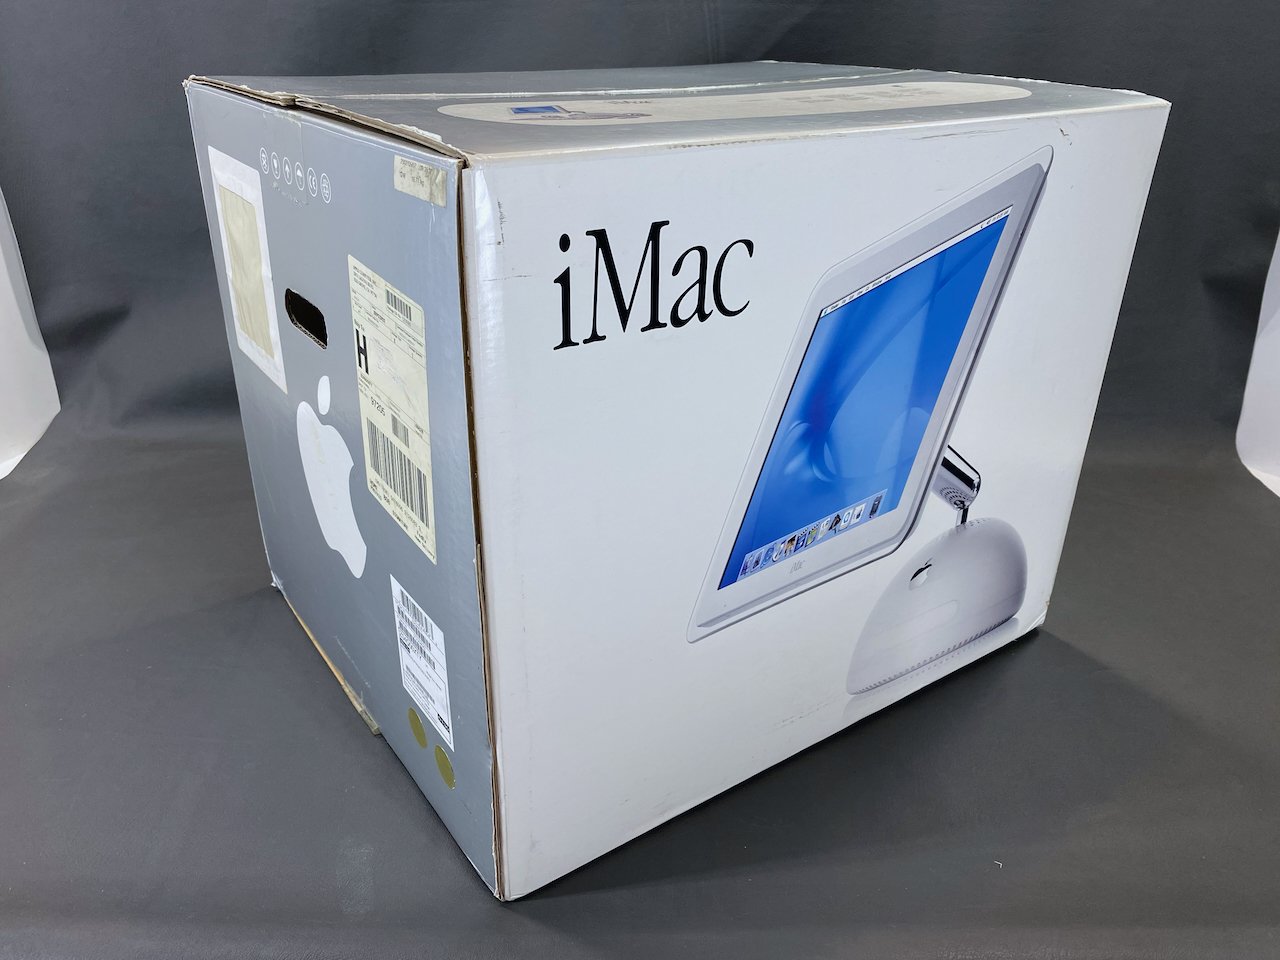
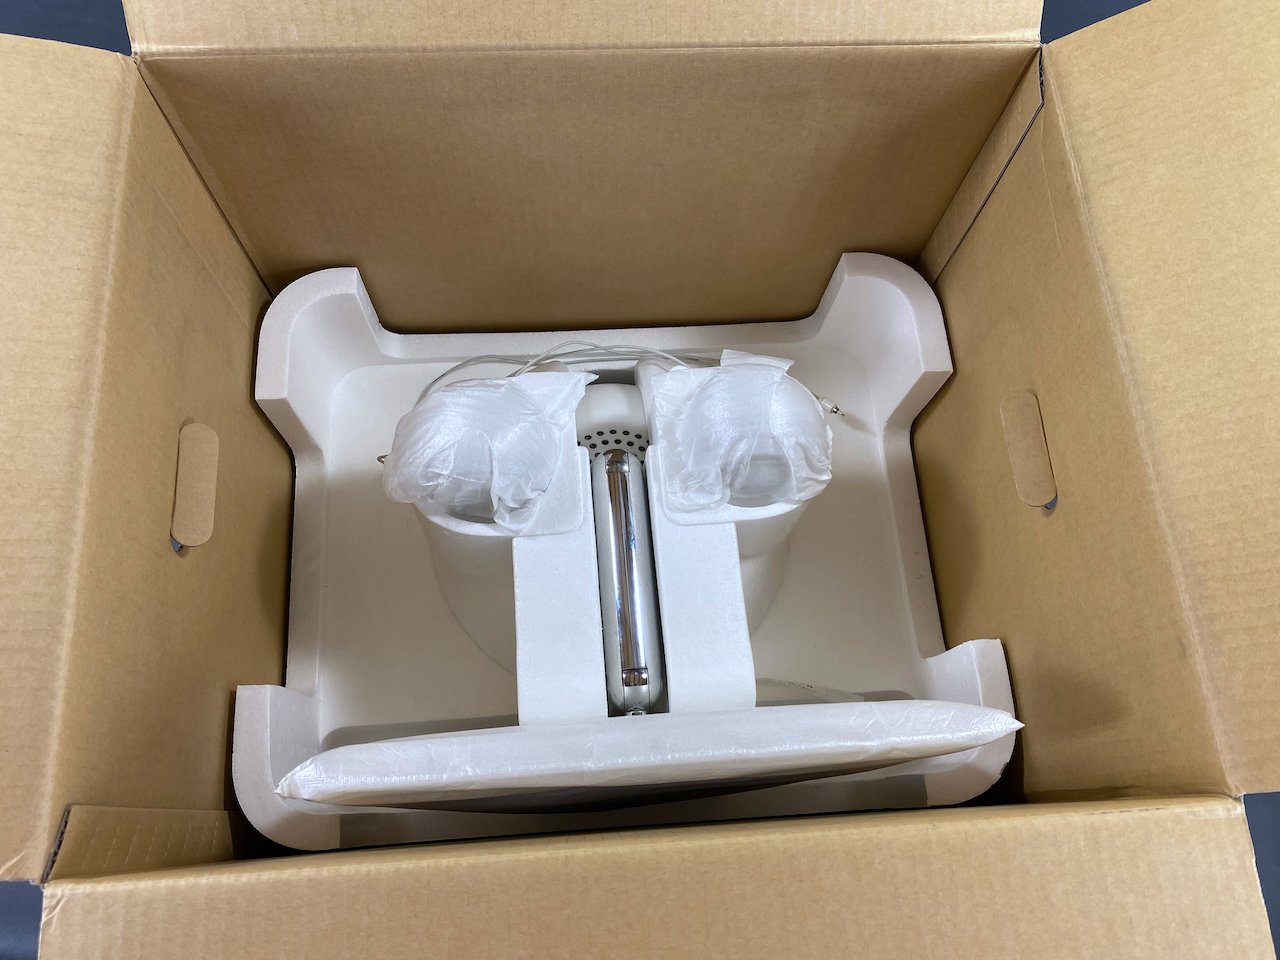
Packaging
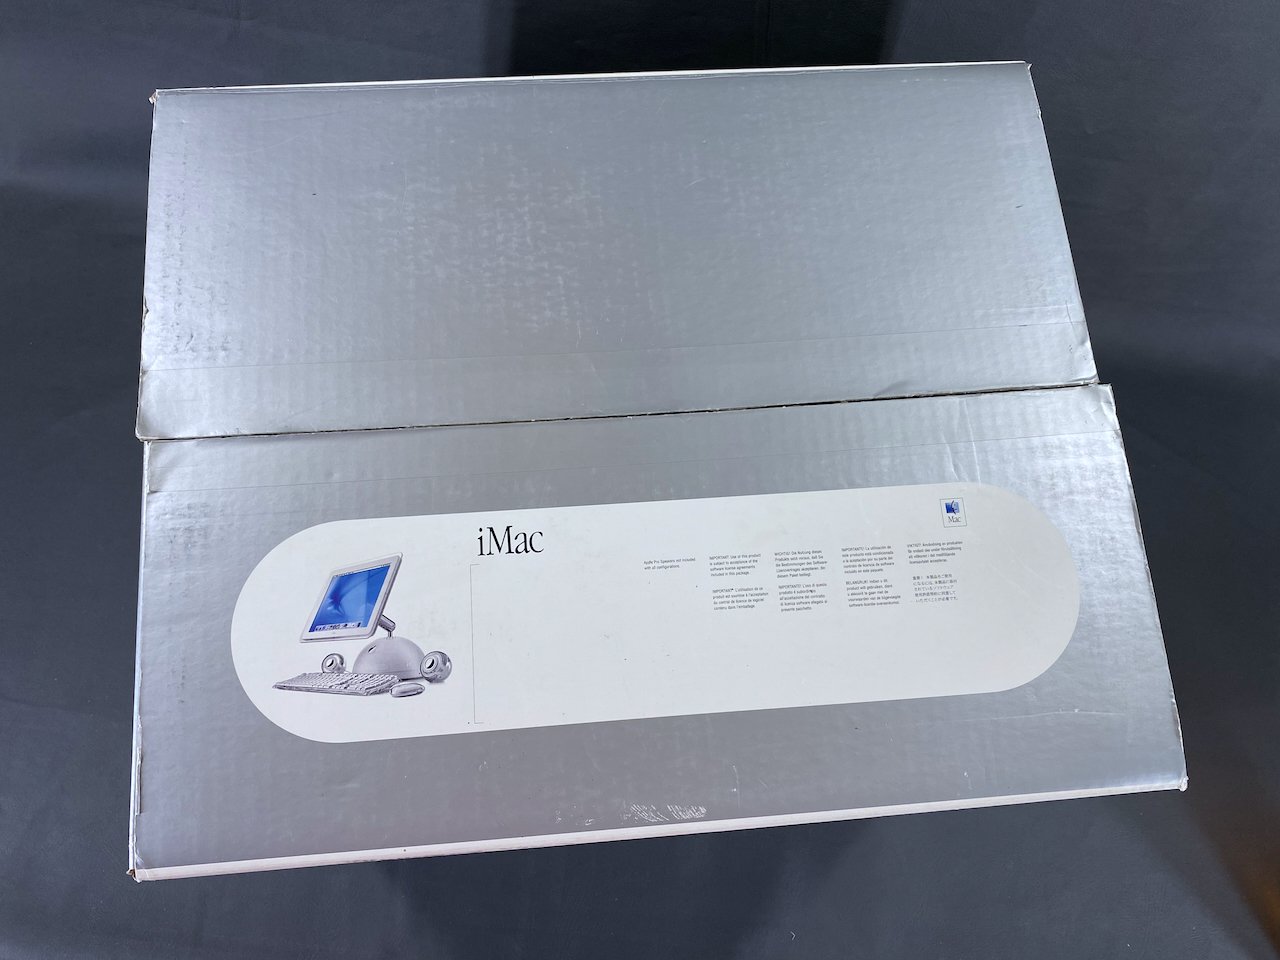

The iMac and Pro Speakers reside on this lower level of the packaging, and the screen is hugged by foam padding.

The original foam shipping bag for the iMac, which covers the screen assembly.


Apple even included some step-by-step instructions detailing how to remove the iMac from the box.
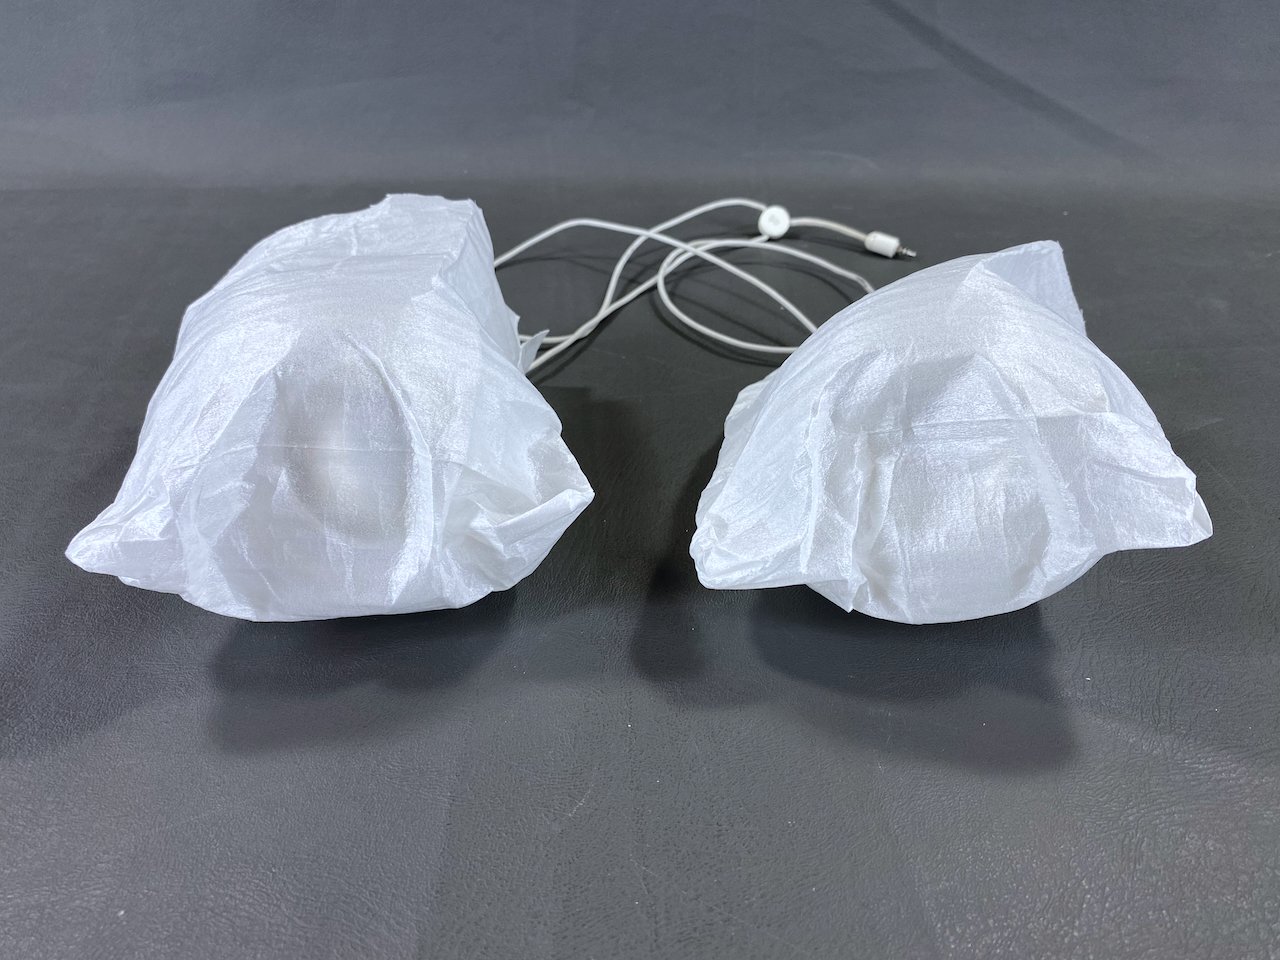
The original foam shipping bags for the Pro Speakers.
iMac
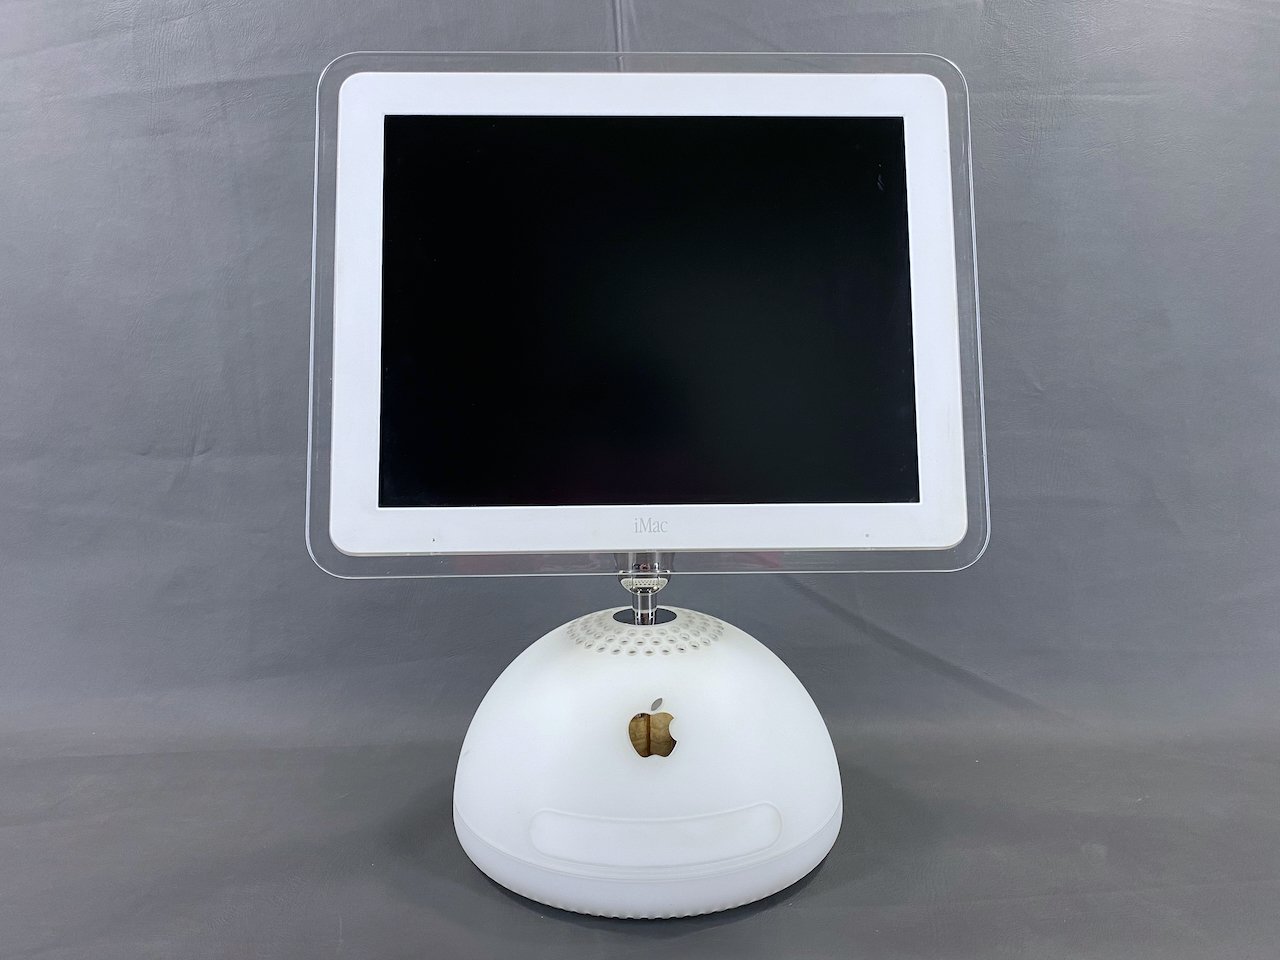


The iMac up and running. It looks gorgeous!
Accessories
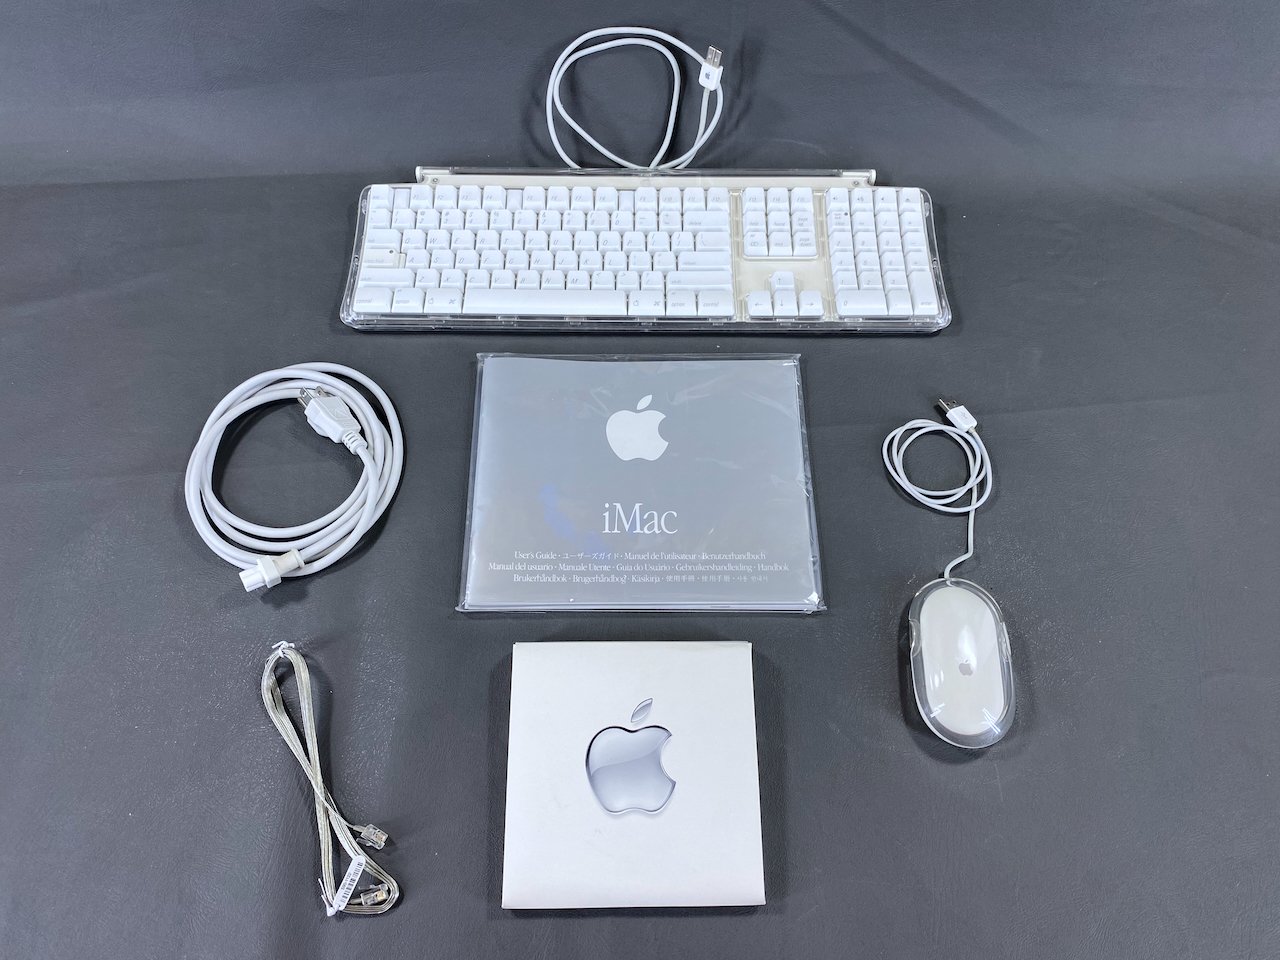
Pro Keyboard and Pro Mouse, power cable, modem cable, software CDs, and documentation packet.

Setup Guide, User’s Guide, warranty info, software license agreements, software coupons, Apple stickers, and CDs: Software Restore (6), OS X Install, OS 9 Install, Applications, and Apple Hardware Test.
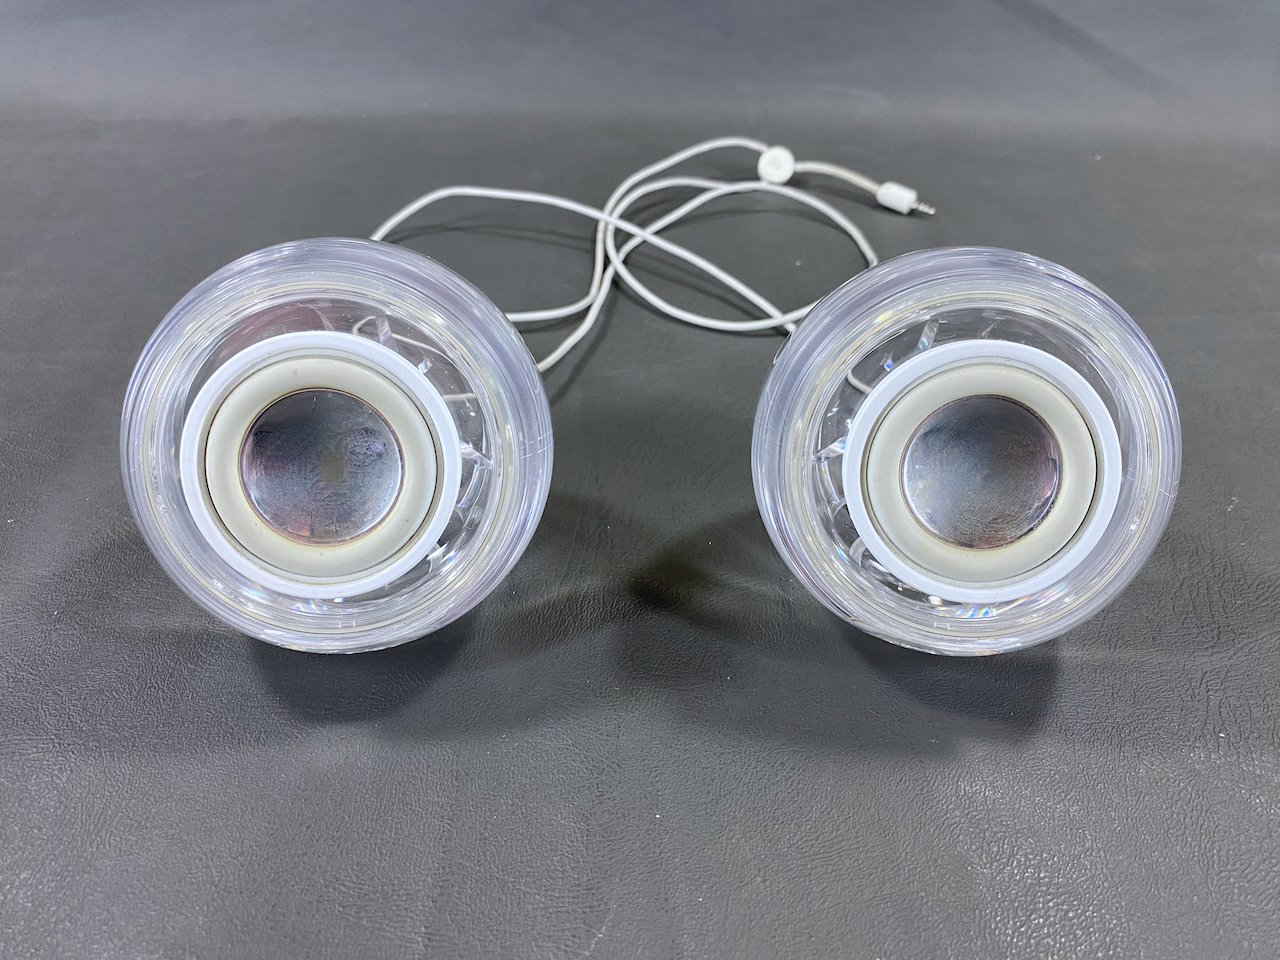
The Apple Pro Speakers (with white surrounds) were bundled with higher-end iMac G4 models like this one.
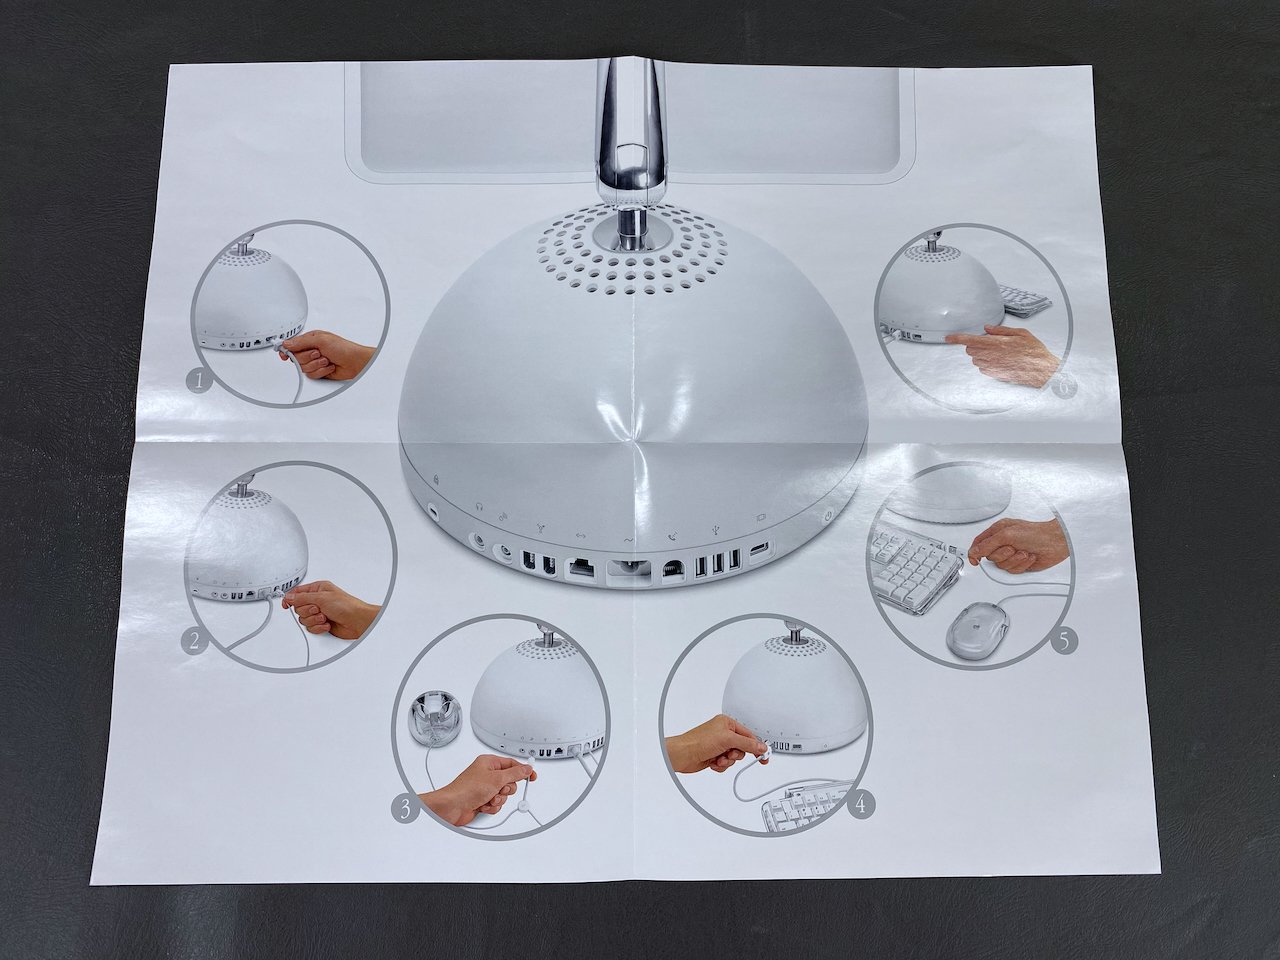
When folded out, the Setup Guide depicts how to set up and turn on the iMac.
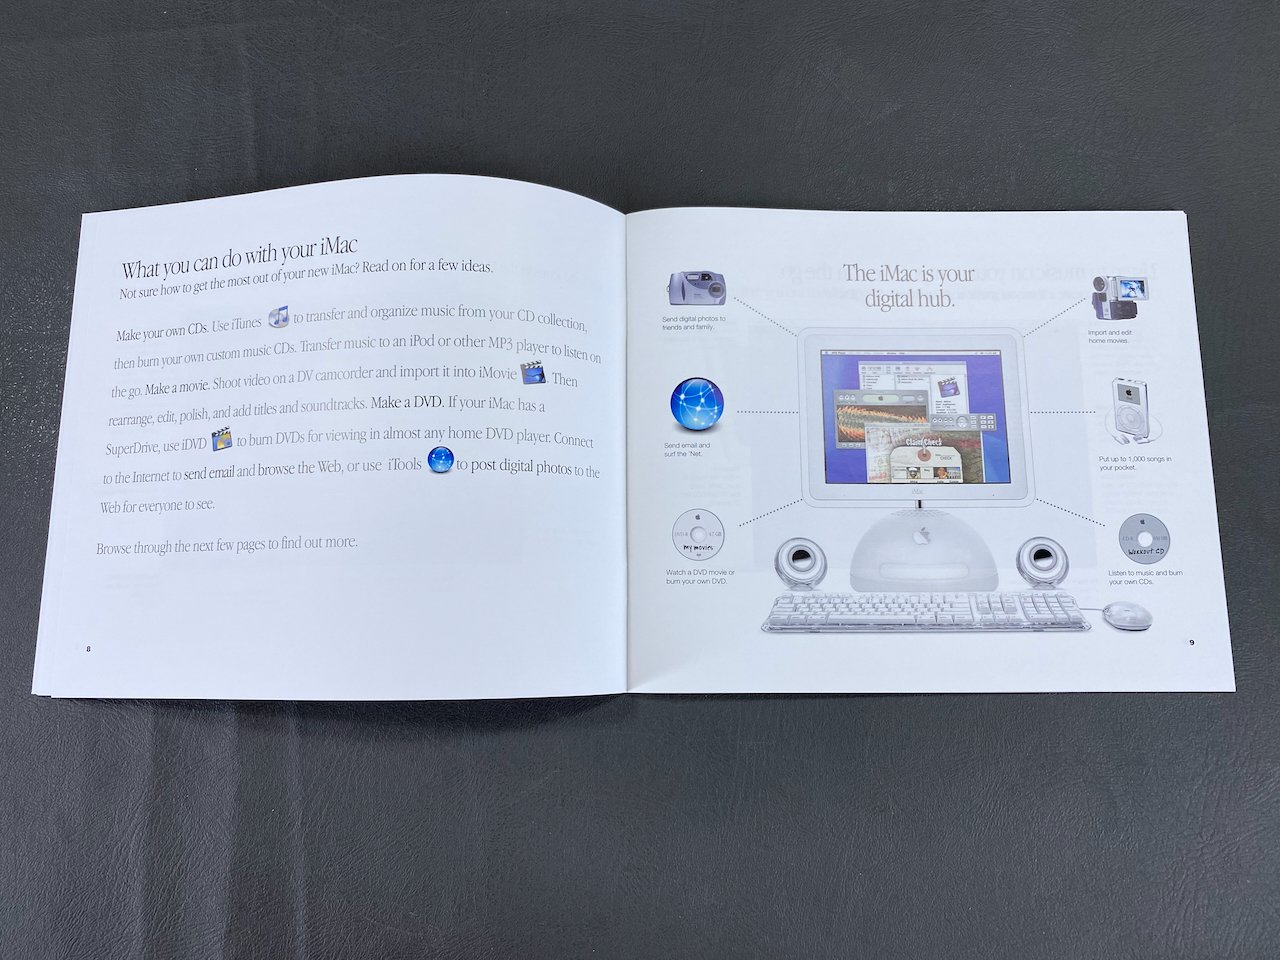
The User’s Guide contains, among other information, this section highlighting Apple’s “Digital Hub” strategy of the early 2000s.
System Specs


Teardown & Cleaning Photos
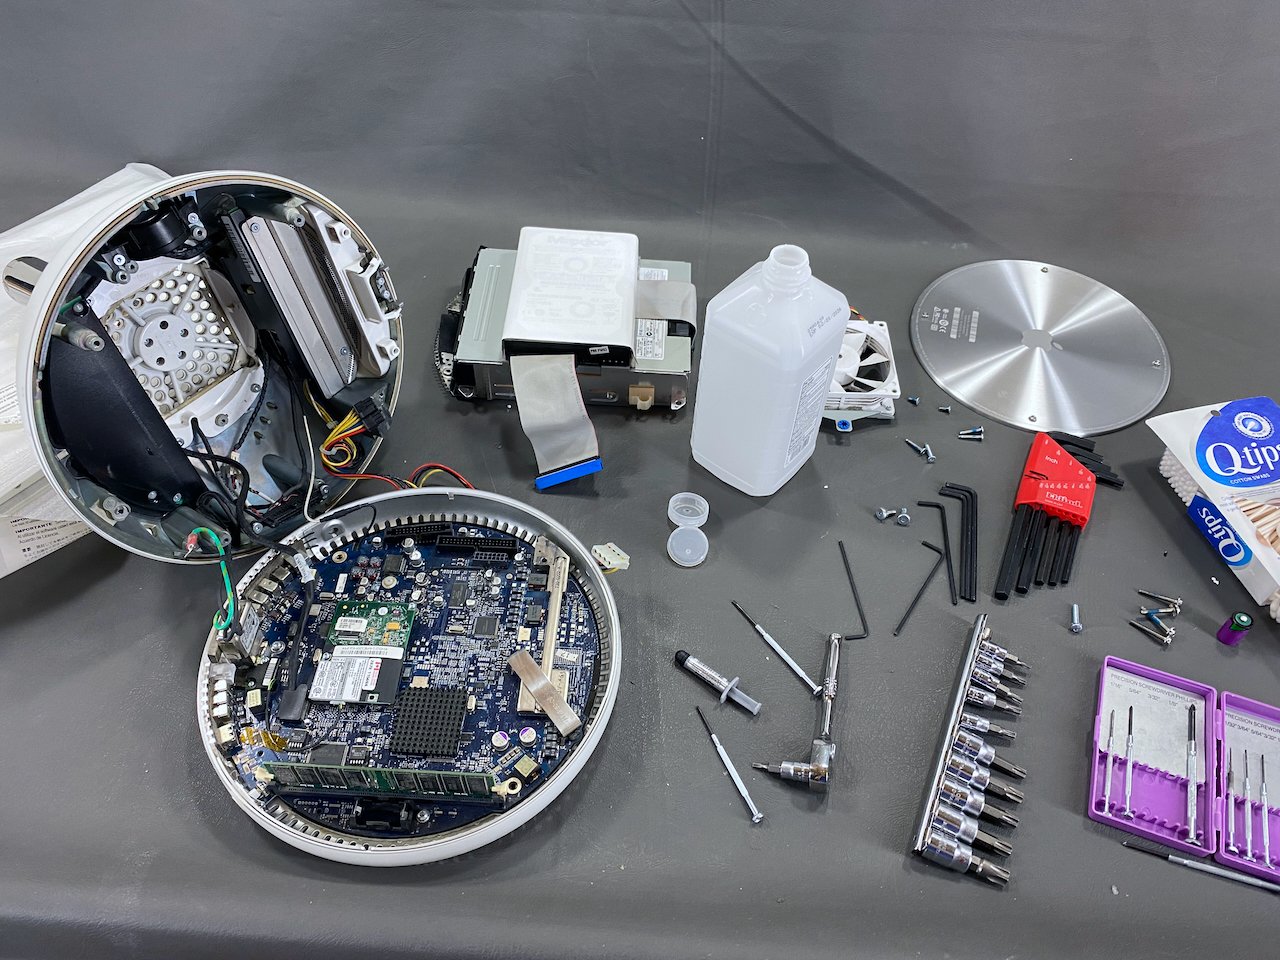
Disassembly of the iMac to clean out the dust, remove the PRAM battery, and apply new thermal paste.
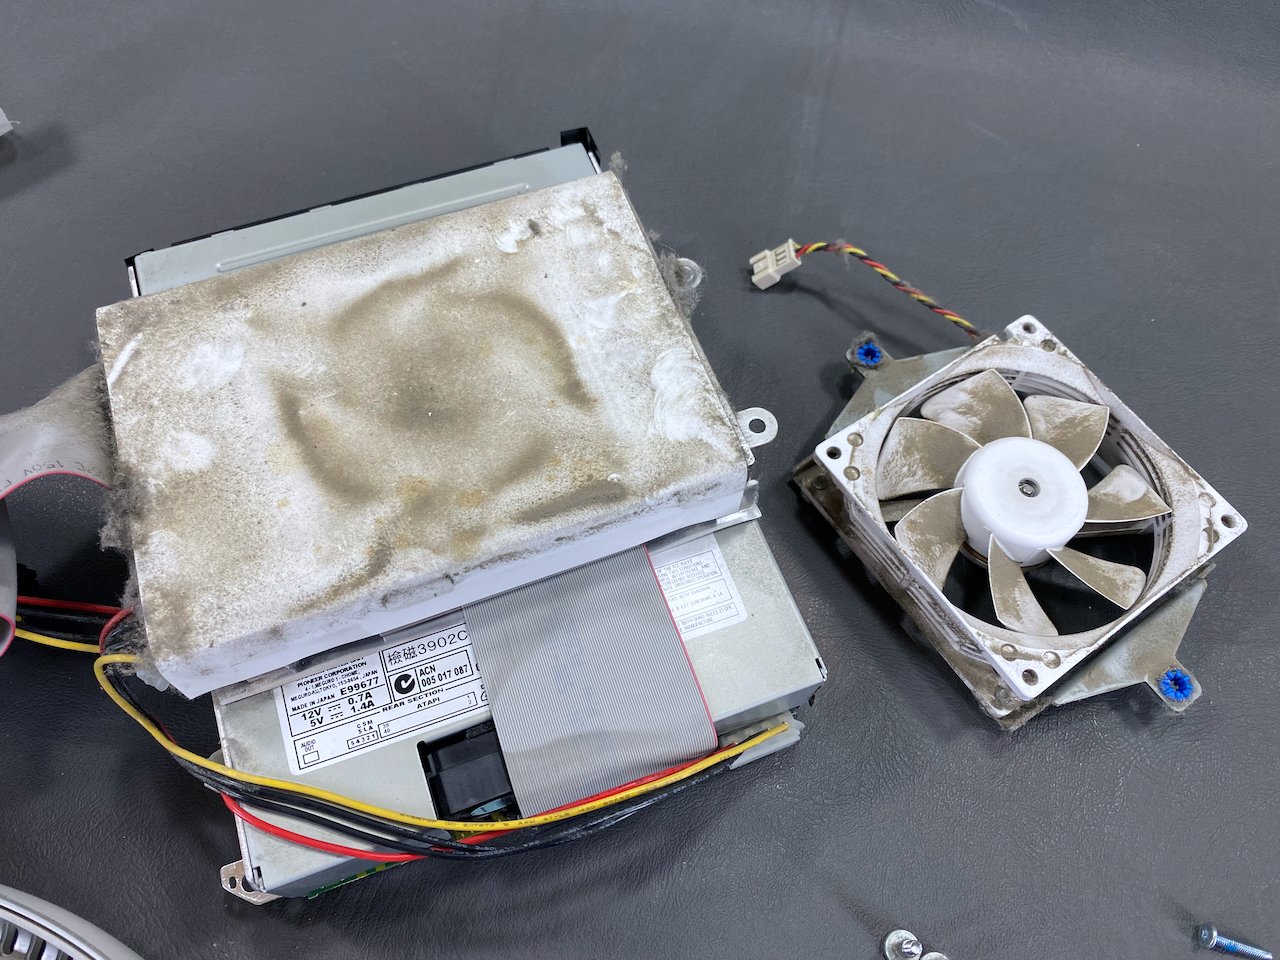
The hard drive and fan were extremely dirty! The original 60 GB HDD seen here (underneath white cover) has since been replaced with an SSD.
Keyboard Teardown, Cleaning, & Retrobrite

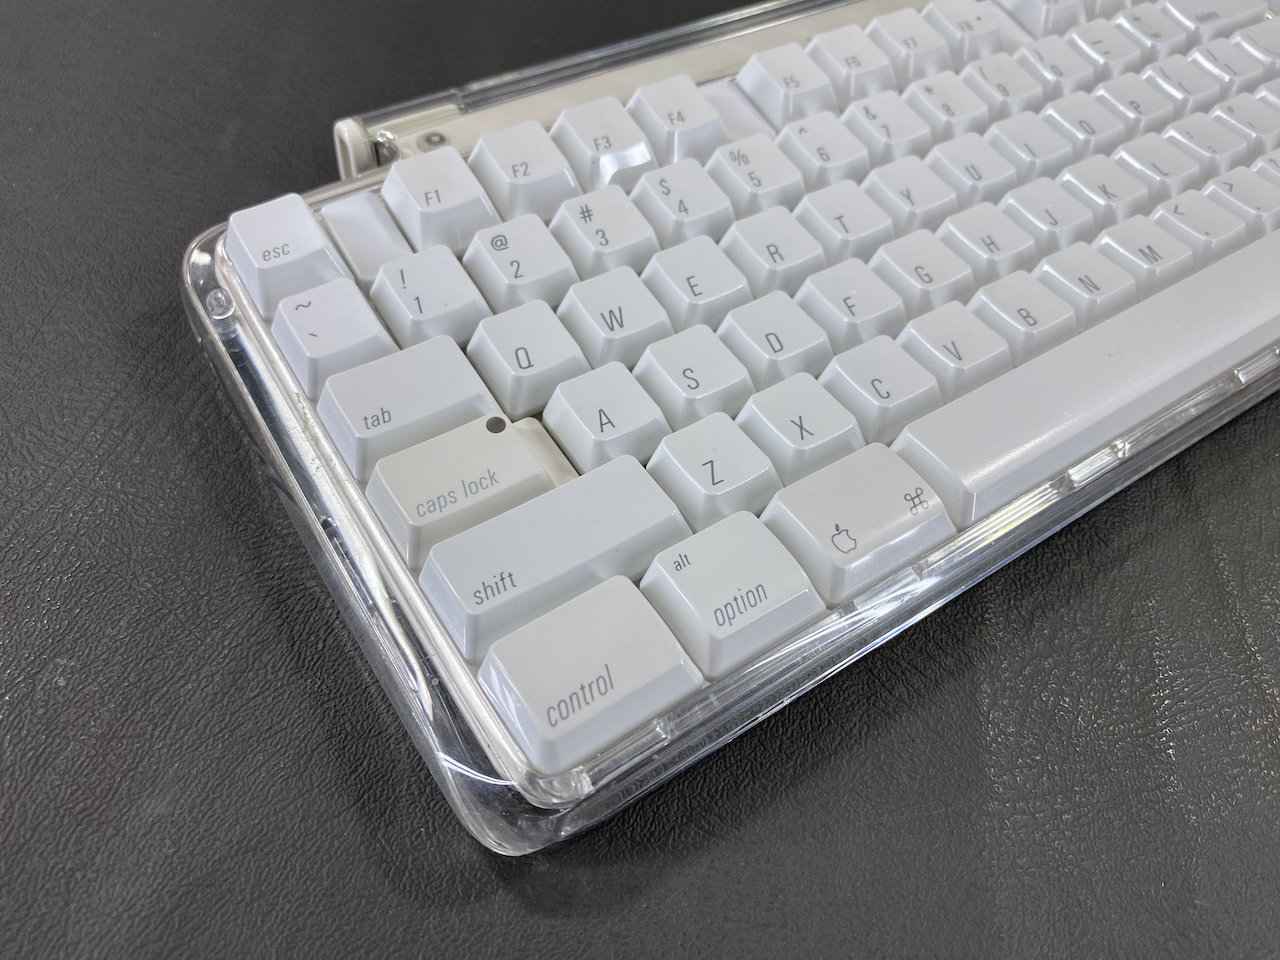
This is what the keyboard looked like when I acquired it. The backing plate and caps lock key had turned a nasty shade of yellow. This is most likely due to age and/or exposure to UV light.
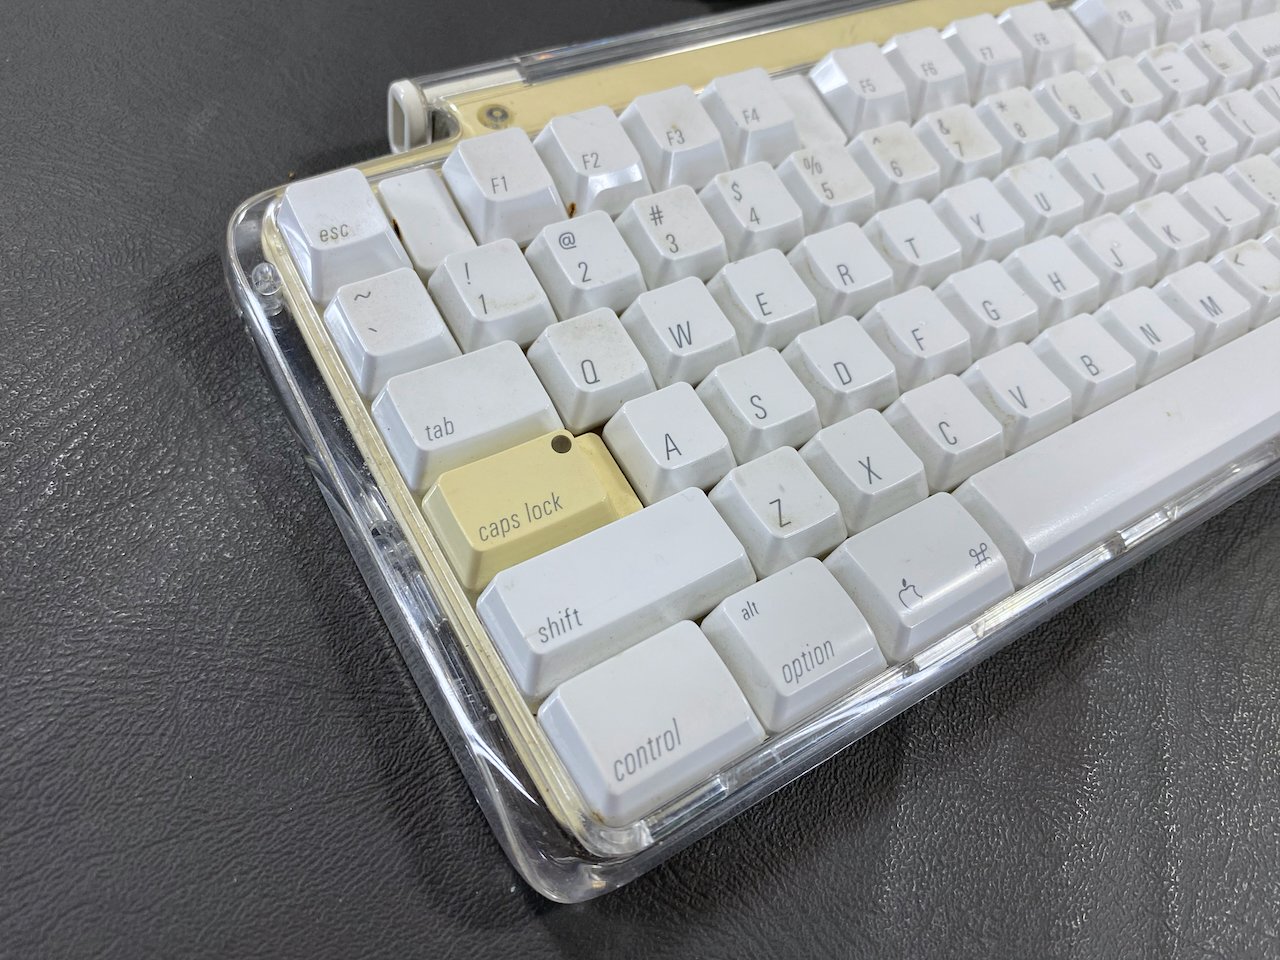
The caps lock key was the only one that had yellowed, so I did not treat any of the others.

Retrobrite in action. I used the submersion method on this one. I won’t get into the details of how this works, but there are many resources and videos online if you’re curious.

A process known as “retrobrite” can be used to reverse yellowing in plastics like this. It involves liquids, so this requires complete disassembly of the item so the yellowed pieces can be treated.

The keyboard was also incredibly filthy, so disassembly also helped me clean it thoroughly.
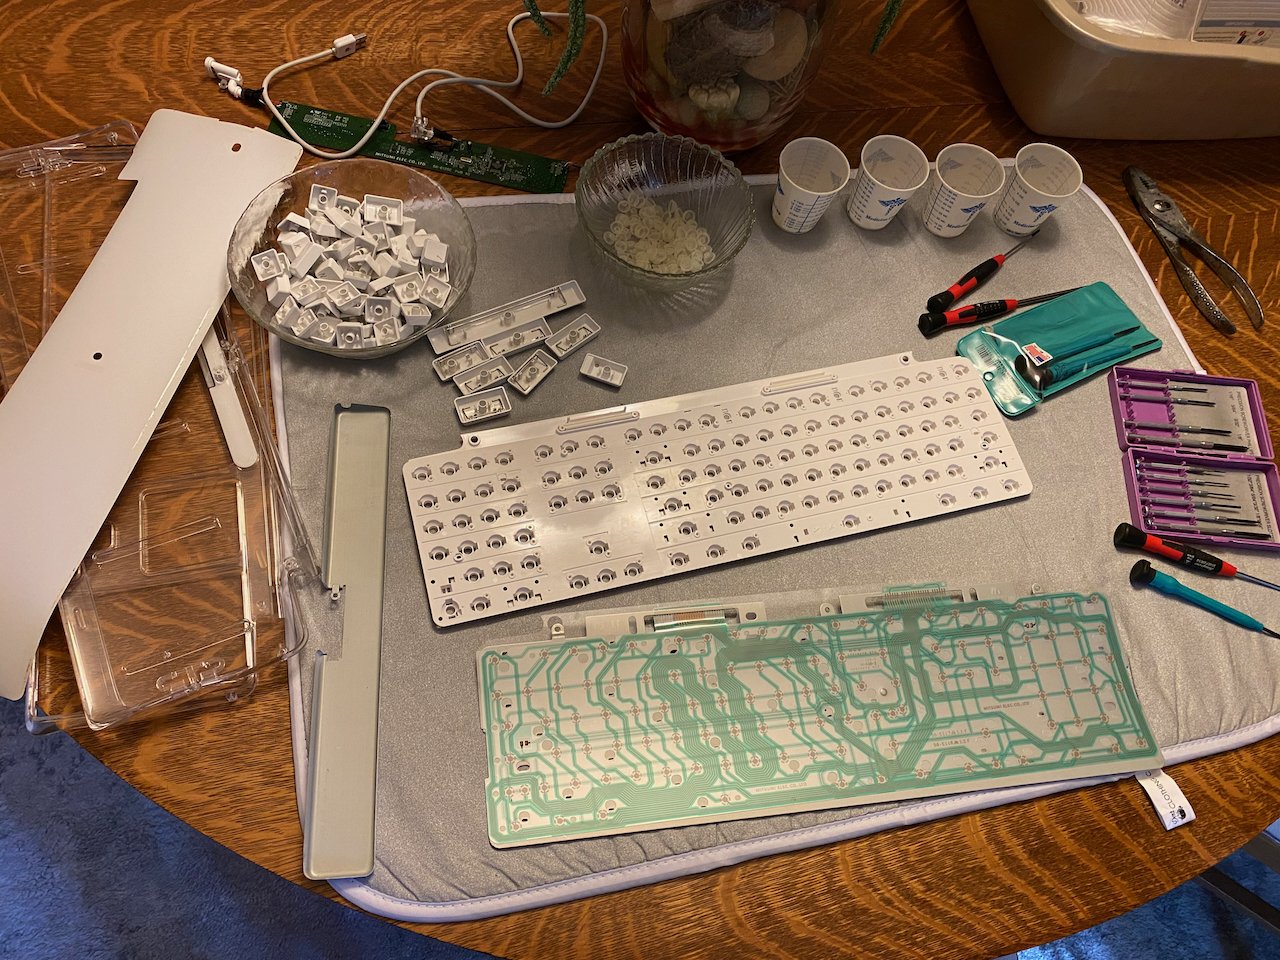
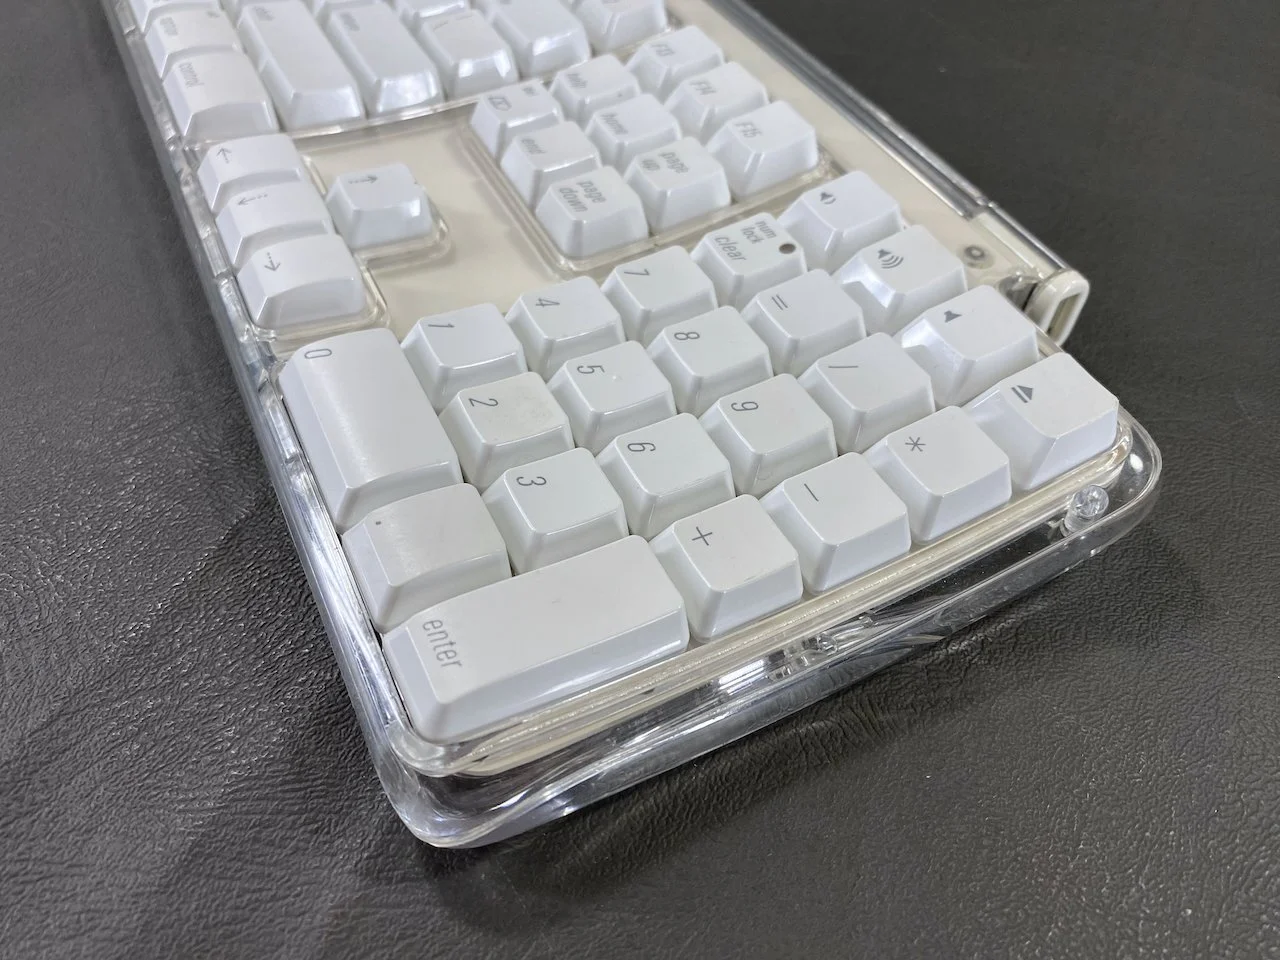
Reassembly of the keyboard after retrobriting. These keyboards are quite complex and time-consuming to disassemble. This model has 109 keys in total.
The “After” photo! A successful retrobrite treatment - it is now the correct white color.
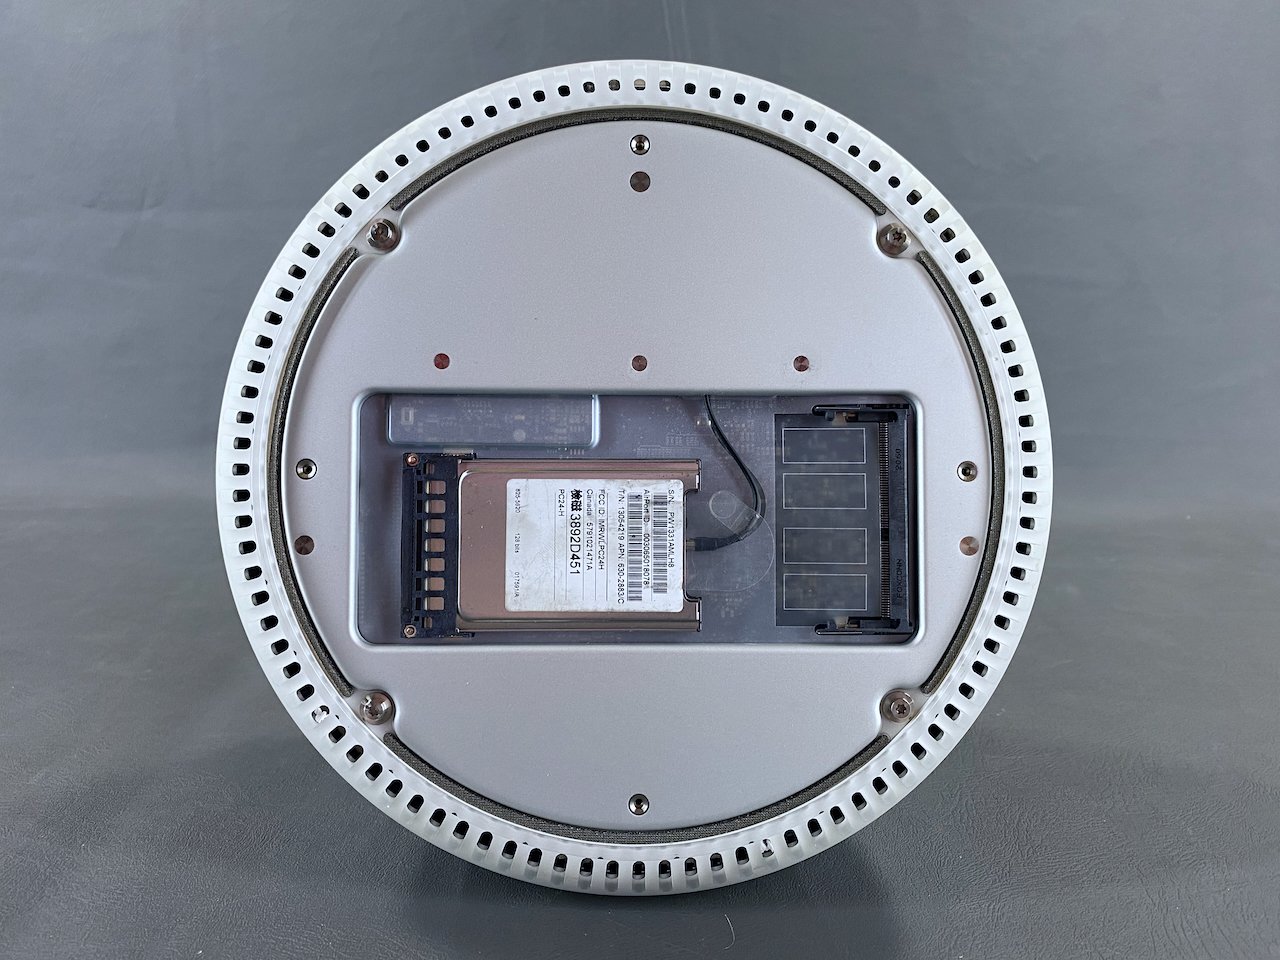
mSATA SSD Installation
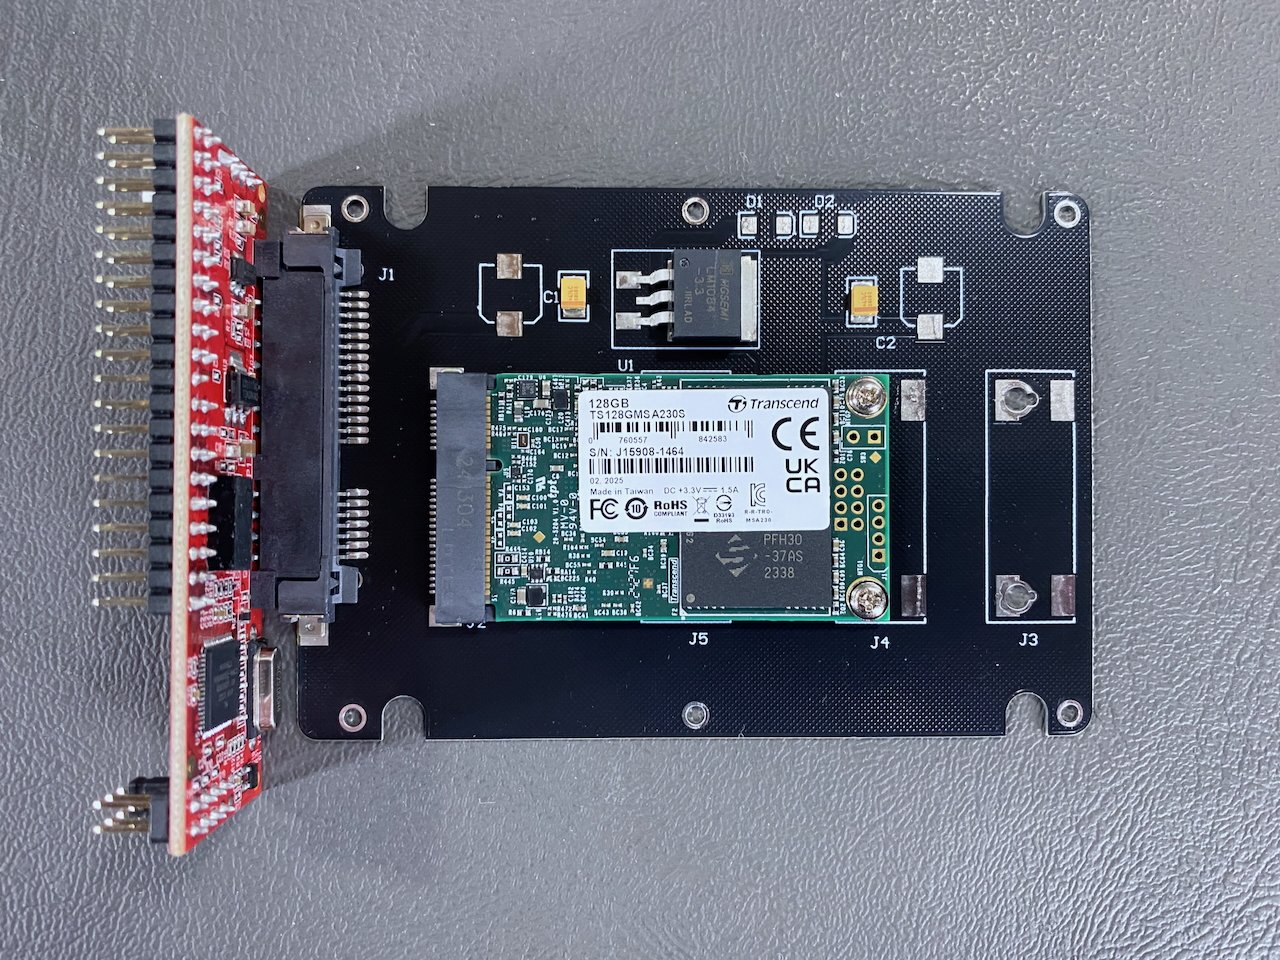
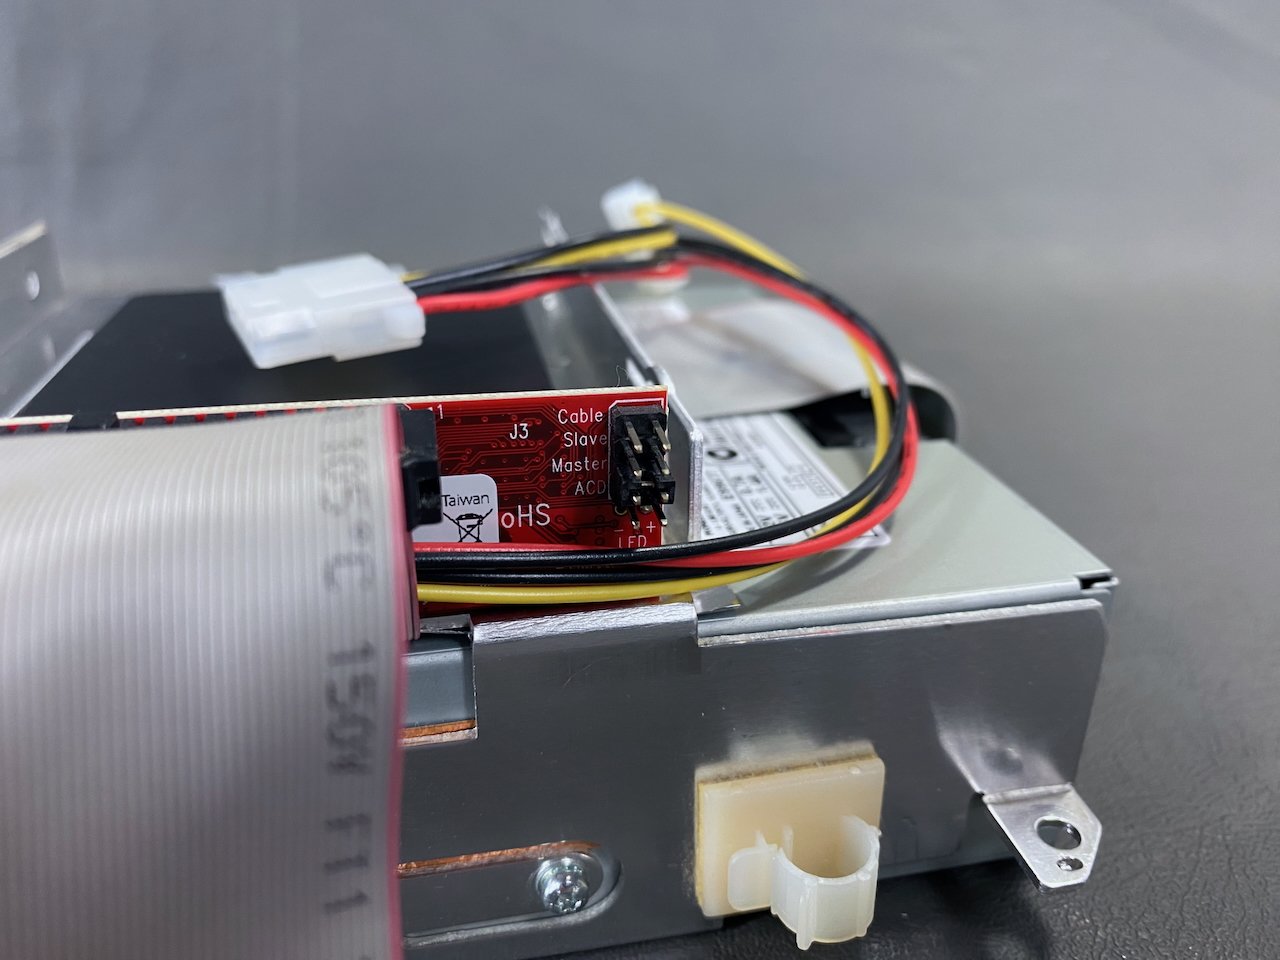
This upgrade makes the computer quieter, faster, and more reliable. I chose to install a 128 GB mSATA SSD using a 2.5” mSATA-to-SATA adapter housing and a 40-pin IDE-to-SATA adapter. These red Startech IDE adapters are known to be very robust and work in many different systems. Unlike many other adapters, they also have the master/slave jumpers which are required in this machine.

This is how I chose to mount the SSD inside the iMac’s drive bracket using some thick double-sided tape. It was a plug-and-play solution with the original IDE and power cables. Space inside the iMac is very tight so I later bundled all the loose cabling inside the HDD bracket around where the SSD now sits. The assembly did fit back inside the iMac even with the new drive and additional cabling.

This is one of the earlier iMac G4 models that has a single IDE controller where both drives are connected to the motherboard using a single cable. Because of this configuration, the iMac’s original hard drive is configured to “Master” in the jumper settings from the factory, and the optical drive is configured to “Slave” (circled in orange).
The new IDE adapter must have a jumper for this (many don’t, but the red Startech boards do) and it must be set to “Master” like the HDD was or the drive will not be recognized. Again, this is only for earlier iMac G4 models like this one - later models use dual IDE controllers with a cable-select configuration.