Twentieth Anniversary Macintosh
2023-’24 Restoration Project
Restoration Overview
My Twentieth Anniversary Macintosh underwent a comprehensive maintenance & restoration project during December 2023 - May 2024. The main reason for this was that the TAM had developed the notorious “Bose buzz” condition, making it unusable for longer than 10-15 minutes at a time, and also several of the internal fans had become quite loud due to age. In addition, these machines (like all vintage Macs of this era) generally require preventative re-capping due to age even if they still work.
Restoration components:
Complete disassembly and general internal cleaning of both the head and base units (see Disassembly Guide page for more on this)
Re-capping of (1) the motherboard, (2) the power distribution board, (3) the Bose amplifier board, and (4) the power supply board
Mitigation of the “Bose buzz”, including replacement of spade connectors on the subwoofer cable and two pin headers on the Bose amplifier board
Installation of replacement cooling fans in the PSU and behind the inverter board (main case fan)
Replacement of the original IDE hard disk drive with a solid-state drive (compact flash adapter)
Disassembly and Cleaning
The TAM is notoriously difficult to disassemble - it is complex, time-consuming, and the brittleness of the plastic is a real challenge. Many parts of it are taped, zip-tied, and glued together from the factory. I managed to disassemble (and then reassemble) mine with minimal damage, but this is a reality of working on these machines today.
See the Disassembly Guide page for more on this.

“Exploded view” of the TAM head and base units

Midway through the disassembly and cleaning process
Recapping and “Bose Buzz” Fix
The motherboard, power distribution board, Bose amplifier board, and power supply board were professionally recapped by Thomas Andrews (Amiga of Rochester). If you need this kind of work performed on your vintage Macintosh or Amiga system, I highly recommend his services!
For a list of the capacitors required to recap the motherboard and power distribution board, see this handy list assembled by iiiDIY. It also lists the capacitors needed for the CD-ROM drive, though this was not done as a part of this project (iiiDIY undertook this additional step on their TAM).
For this project, the original electrolytic capacitors on all four of the boards were removed and replaced. Polymer tantalum capacitors were used on the logic board, and electrolytic capacitors were used on the Bose amplifier board. For the power distribution board, a combination of polymer and polymer tantalum capacitors were used. The polymer tantalum capacitors used were de-rated by approximately 20% per unit.
The two pin headers on the Bose amplifier board were also replaced with new coated units.
Thomas produced a series of content documenting portions of the process:
Blog post - overview of the project
Livestream (portion) - unboxing the TAM components
Video - pre-recap overview of the boards and other components of the project
Video - post-recap overview of the work that was done
———————————————————————————————————————————————————————
Motherboard

BEFORE

AFTER
———————————————————————————————————————————————————————
Head Unit Power Distribution Board

BEFORE

AFTER
———————————————————————————————————————————————————————
Bose Amplifier Board

BEFORE

AFTER
———————————————————————————————————————————————————————
Power Supply Board
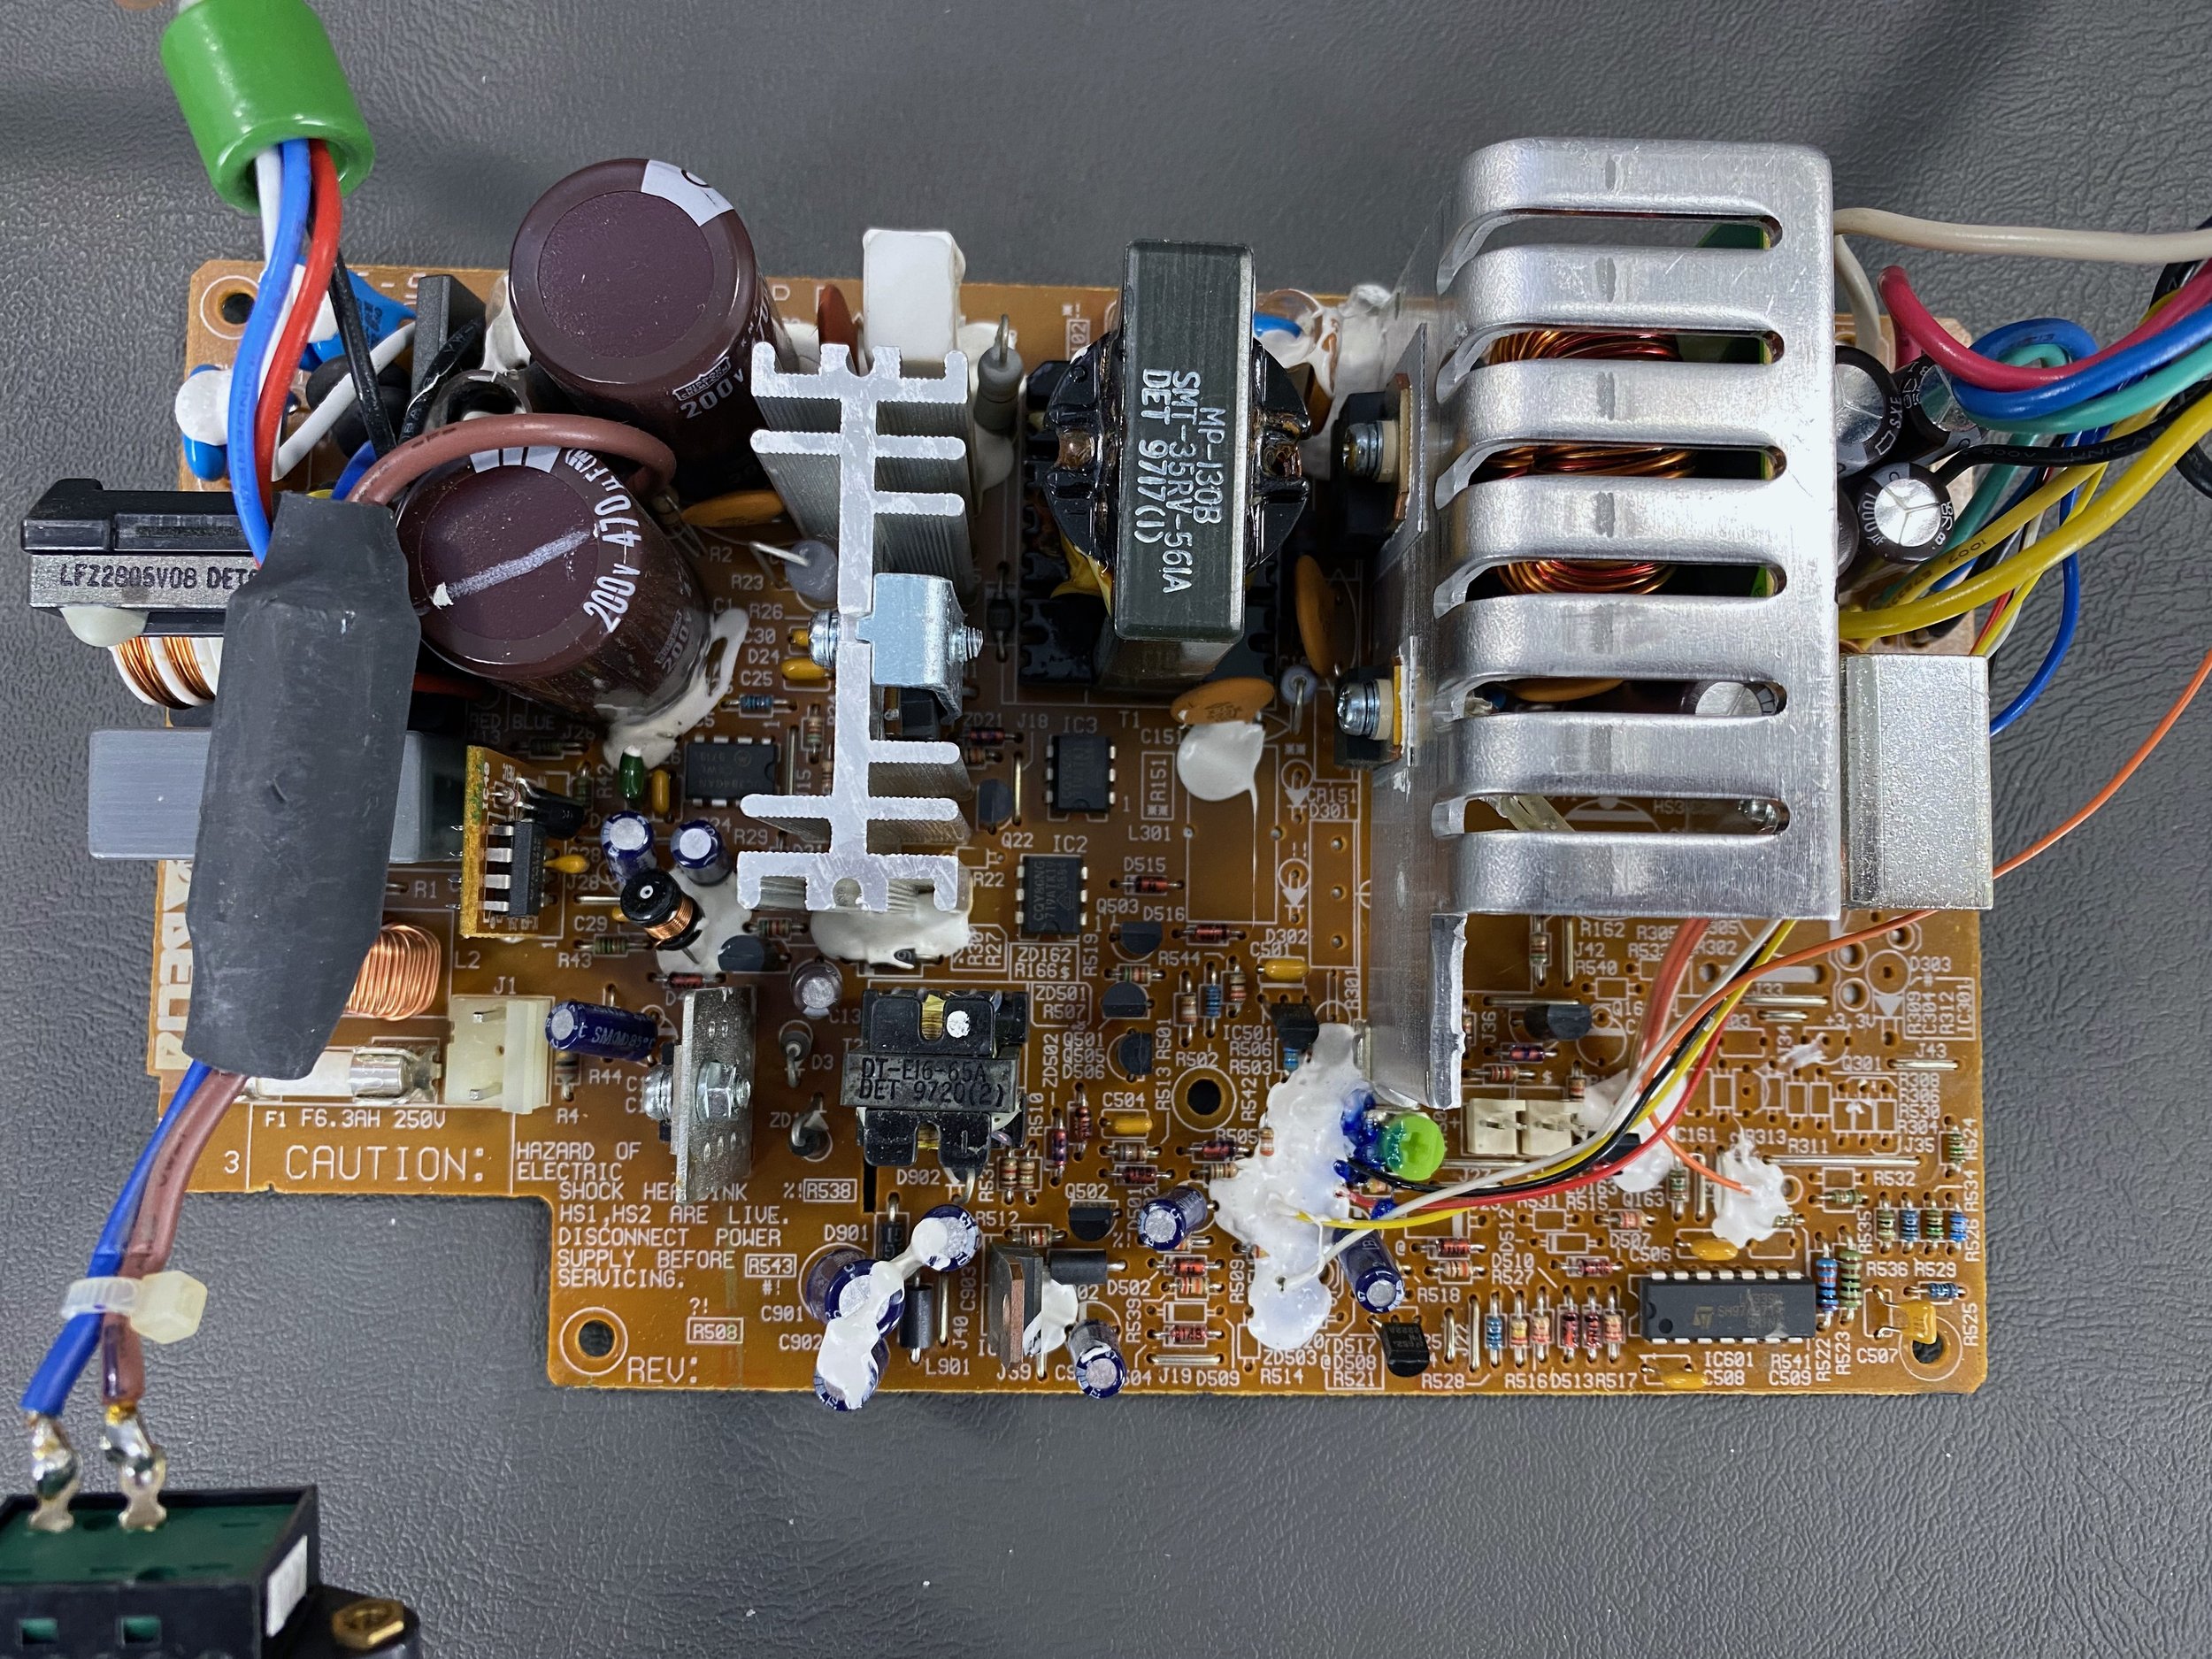
BEFORE

AFTER
———————————————————————————————————————————————————————
Subwoofer Cable

The original (non-coated) spade connectors on the subwoofer cable were replaced with the new (coated) ones seen here, as a part of the "Bose fuzz” fix.
Fan Replacements
The main head unit case fan is located deep inside the machine behind the inverter board. Accessing it requires complete disassembly of the head unit, so I swapped it out during the restoration since the case had to be disassembled anyway.
Link to the replacement fan I used (2-pack): https://www.amazon.com/dp/B07VCCLDZZ

The new (replacement) fan

Old fan (top) next to new fan (bottom)
—————————————————————————————————————————————-
The PSU fan was also replaced, which is located deep inside the base unit. Accessing it requires complete disassembly of the base unit and power supply, so I swapped it out during the restoration since the PSU had to be disassembled for the recap anyway.
Link to the replacement fan I used: https://www.amazon.com/dp/B07RNZFVPP
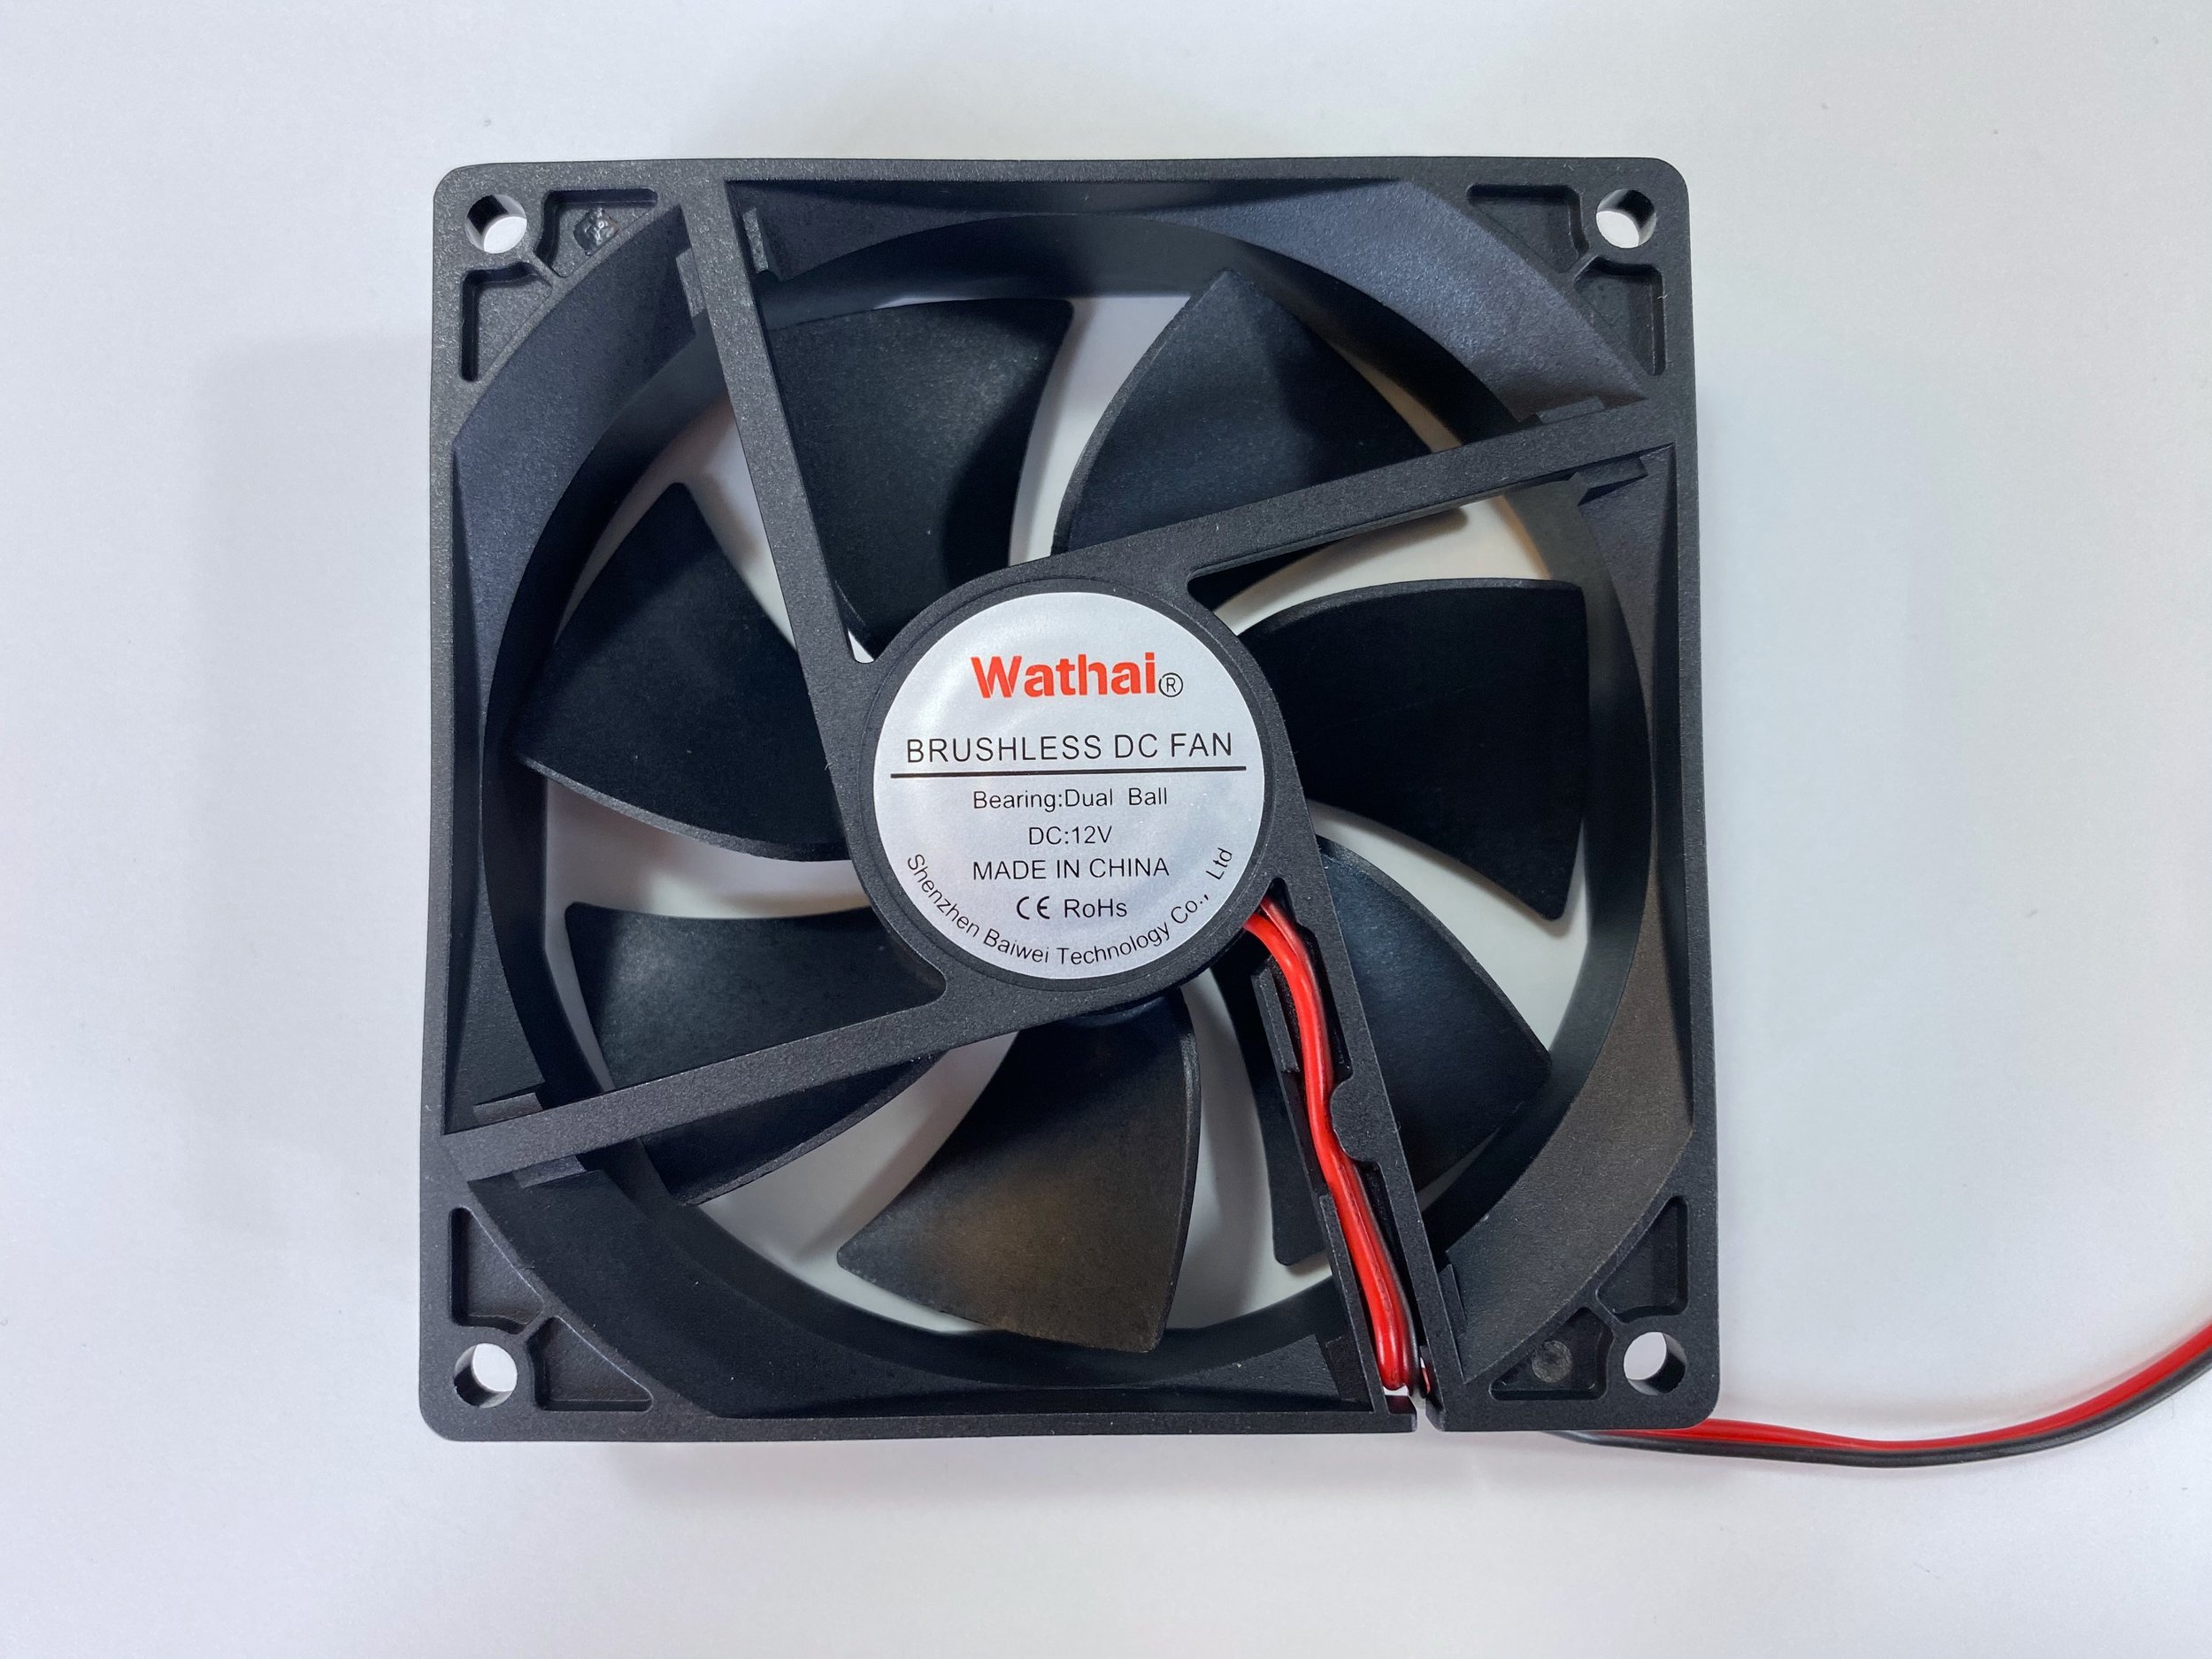
The new (replacement) fan

Old fan (top) next to new fan (bottom)
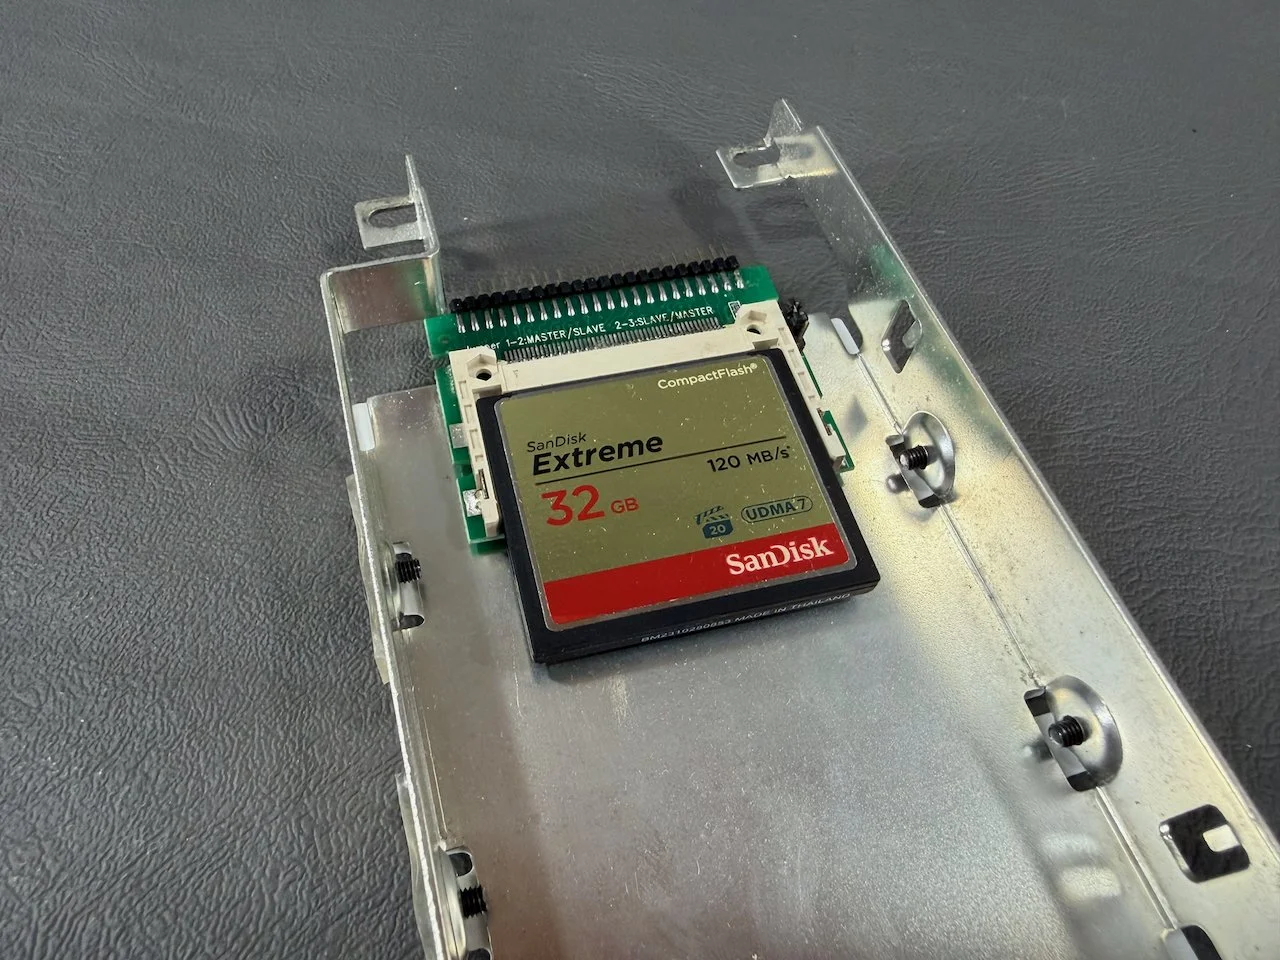
Hard Drive Replacement
The original 2GB IDE HDD was replaced with a compact flash (CF)-to-IDE adapter and a 32GB SanDisk CF card. This upgrade makes the computer quieter, faster, more reliable, and is also reversible if desired.
Link to the adapter: https://www.amazon.com/dp/B07WC9B86M
Link to the CF card: https://www.amazon.com/dp/B00NUB2Q9E